In Which I Make My Peace With Cornbread Dressing

Some of y’all might remember that I swore off cornbread dressing after our
unfortunate stomach virus incident this past Thanksgiving. In fact, I was so deeply opposed to cornbread dressing that I made pizzas for Christmas dinner, and I’ve thought more than once that cornbread dressing and I were done forever.

FOREVER.

But 2009 brought new resolve to be faithful in the small things, and one of those small things is to plan and prepare meals for my family without wrecking our grocery budget. Since cornbread dressing is inexpensive to make, I figured it was just a matter of time before it showed up again at our dinner table.

*shudder*

So last week I bought a family pack of pork chops for cheap dollars and thrifty cents, and I decided to make pork chops and dressing. I knew a big batch would stretch for several meals, and I figured that if the dressing bothered me that much I could just load up on butterbeans and deal with it.

When it came time to make the dressing I realized that I wasn’t quite ready to deal with my mama’s recipe again. I didn’t want diced pieces of onion or celery within a five-mile radius of my person, and I double-dog dared raw eggs to enter the picture. So I improvised.

And I have to say: the dressing? IT WAS TASTY.

So I thought I’d share.

*****

Pork Chops & Dressing

6-8 pork chops (I used bone-in)
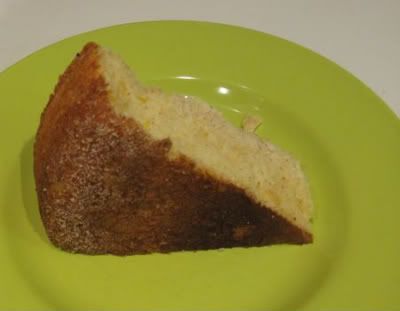
one batch of delicious tasty cornbread (I left out the creamed corn this time)
1/2 cup butter
16 oz. beef broth (chicken broth would work fine – beef broth was all I had)
1 can cream of chicken soup

Make cornbread according to directions. When it comes out of the oven, flip it into a large mixing bowl. Add the butter, and break apart the cornbread until it’s well-combined with the butter. Add broth, soup, and then taste. Add salt and pepper if necessary.

Heat skillet (medium high-ish), then pour in a couple of tablespoons of your favorite oil. Season pork chops with salt and pepper, then brown on each side for 3-4 minutes.

Spray a baking dish with non-stick spray, and place browned pork chops along the bottom of the dish. Spread dressing mixture on top of the pork chops, then cover the baking dish with aluminum foil.

Bake (covered) on 350 for about 45 minutes. Then remove foil and bake another 15 minutes.

*****

Oh, it’s good, y’all. The pork chops stay nice and tender, the dressing doesn’t get dry, and your family will love it.

Happy dressing, everybody!

Chocolate Gravy, Oh My Word

Even though I grew up in the South, I’d never heard of chocolate gravy until a couple of years ago when a guy at our church asked me if I’d ever tried any.

And I’m not positive, but I believe my response was something along the lines of “WHATCHOCOHUH?”

My friend explained that his grandmother had made chocolate gravy for years; it was their family’s favorite biscuit topping. And all I could think was that if I lived in a world where it was possible for gravy to be made with chocolate, then some sort of cheesecake syrup should be our nation’s next collective culinary goal.

Why, you ask?

Because, my friends, I believe in this country, this land of opportunity, this place where we like to take two unhealthy foods and mix them together until we’ve created a new food that is tastier and, lo, even more unhealthy.

God Bless America.

Anyway, I’d never actually tried chocolate gravy until a sweet friend made some for breakfast on New Year’s Day, and honestly, I cannot think of a finer way to start 2009. It was beyond delicious and just the teensiest bit life-changing. Plus, it opens up a whole new breakfast avenue – Dessert Biscuit Avenue, to be more precise – and I cannot wait to make it and serve it alongside All The Bacon we plan to eat in 2009.

I feel like I should wave an American flag or something.

Chocolate Gravy

1 cup sugar
2 tablespoons Hershey’s cocoa (you can use 1 Tbs. regular and 1 Tbs. dark if you like)
2 tablespoons self-rising flour
3/4 cup hot water
3/4 cup milk

Optional:
2 tablespoons butter
1/2 teaspoon vanilla

In a skillet, mix flour and cocoa and sugar. Turn heat to medium.

Slowly add the hot water, a little at a time. Keep stirring this paste until the sugar dissolves.

Slowly add in the milk. When completely mixed, turn up the heat to medium high.

Stir constantly until desire thickness is reached. Add butter and vanilla; keep warm on low until the biscuits are done.

(For gravy that is less like syrup and more like pudding, add 3 tablespoons flour and use only milk.)

COME ON, NOW.

And this recipe is in the Siesta Fiesta Cookbook – so if you have one of those, you’re good to go.

Now if you’ll excuse me, I’m off to make some soft tacos for supper.

Perhaps I will batter and deep fry them as an homage to my Southern cooking heritage.

Amen.

Sometimes A Little Cornbread Makes Everything Better

People. Do you know what occurred to me yesterday?

I have never shared my cornbread recipe with you.

I can’t even believe it. THREE YEARS I’ve been “writing” this interweb blogsite, and somehow I have neglected the cornbread. I mean, we’ve talked about butterbeans, about blackeyed peas, about pound cake – and heaven knows we’ve talked about fried chicken.

But the cornbread? Not so much. Frankly, I can’t help but feel that I’ve failed you. And I do apologize.

Because oh, I adore the cornbread. It’s one of the very best parts of fall and winter (along with flannel pajama bottoms, soft blankets, blazing fires and long-sleeved t-shirts). And over the years, I’ve taken the cornbread recipes from my mama, my friend NK’s mama, the back of the Martha White corn meal bag (not to mention the lovely Ms. Paula Deen) and blended them into some crazy amalgamation that sounds super-weird in theory but is utterly delicious in practice.

So. Before you make this cornbread, you need to know that there is one non-negotiable part of the process: a cast-iron skillet. You can’t pour this concoction into a Pyrex dish and expect to get anywhere near the optimal result. And if you don’t have a cast-iron skillet, run – RUN! – to your local hardware store and get one. It’s the best kitchen-related $20 you’ll ever spend, hallelujah.

I also think this is a critical component:

I’ve tried all the mixes. I’ve tried using corn meal and flour and salt. But this stuff is the best. It’s finely ground and makes a really dense cornbread. It can also be a little hard to find, but it’s worth tracking down. Because it’s special.

And with all that being said, the recipe:

2 cups White Lily White Cornmeal mix
2 eggs
1 cup creamed corn
1 cup sour cream
1 1/3 cups milk
1 tablespoon sugar (optional)
1/4 cup canola oil

Preheat your oven to 425 degrees. Put your skillet on top of your stove over medium high heat. Once the skillet is hot, add the canola oil, then sprinkle about 2-3 tablespoons of cornmeal mix on top. While the cornmeal mix is browning, mix together all your remaining ingredients in a bowl.

Once the oil is hot and the cornmeal is browned, pour about 1/2 of the oil from the skillet into your mixture, then return your skillet to the stove (CAREFUL! FOR THE LOVE OF PETE, BE CAREFUL!). Quickly stir your batter and pour all the batter into the skillet.

And then? THEN? It will sizzle like it’s on FI-IRE.

Let the skillet sit on the stove over medium heat for about two minutes (it’s making you a delicious crispy present). When the time’s up, put the skillet in the oven and bake for 25-30 minutes.

And I don’t mean to taunt you or anything, but just look at the results:

THAT CRUST? IS YOUR FRIEND.

Yesterday for lunch we had some blackeyed peas with our cornbread, a combination that is utterly perfect on a chilly fall day.

And, you know, I may have added a little butter to my cornbread.

Don’t worry. It was just a pat. Or six.

I’m sure you understand.

I Forgot. Imagine That.

I was supposed to tell you that you can win a $100 gift card courtesy of Kraft.

So I’m telling you now.

And I even wrote a little something that you can read when you click over there.

As you know, I’m always happy to be a part of anything that involves cheese.

Look! I’m Cooking! With Real-Live Food!

So truth be told I haven’t been very diligent in the menu-planning department lately, and more often than not I feel like I’m winging it at suppertime. It doesn’t help that I am perfectly content to eat Cheez-Its or a scoop of peanut butter or a bowl of cereal and then consider supper checked off my list, but I do understand that there are two other people in this house who appreciate hot food.

Well, really there’s just one other person in this house who appreciates hot food. Because if left to his own devices, the five year-old would pretty much eat Oreos with a side of Cheetos three times a day and then snack on Skittles.

Which is why the preparation of actual meals with actual vegetables is fairly important around these parts.

Anyway, yesterday I actually sat down and planned what I was going to cook this week (remember when I used to do that? here on the blog? oh-so-faithfully? yeah. good times.), and I remembered a casserole that I love but haven’t cooked recently because I sort of burned out on casseroles about six months ago.

Can you tell that I haven’t really been that into cooking lately?

You may have picked up on that.

But this particular casserole is oh-so-delicious – and it’s a good way to work some asparagus into a meal since, strangely enough, kids tend to like green vegetables better when they’re covered with a yummy cheesy sauce. You can use canned or fresh asparagus – just make sure to boil it ahead of time if you use the fresh stuff.

And this recipe will feed at least ten people – so you should have plenty of leftovers.

Unless there are ten people in your family.

And if that is the case, then hats off to whomever is doing the cooking because, well, YOU ROCK.

Chicken and Asparagus Casserole

1 medium onion, chopped
1/2 cup butter (you can use a little less if you’d like. I say go big or go home.)
1 (8 ounce) jar sliced mushrooms, drained
1 can cream of chicken soup
1 (5 ounce) can evaporated milk
8 ounces sharp cheddar cheese
1/4 teaspoon Tabasco sauce
2 teaspoons soy sauce
1/2 teaspoon ground black pepper
1 teaspoon salt
1/2 teaspoon Accent
2 tablespoons chopped pimiento, drained
6 chicken breasts, cooked and cut into bite-size pieces
2 (15 ounce) cans green asparagus spears
1/2 cup slivered almonds

Preheat oven to 350. In a skillet, saute’ onion butter until tender. Add remaining ingredients except chicken, asparagus and almonds. In a lightly greased 13 x 9-inch baking dish, layer half of chicken, 1 can asparagus and half of sauce. Repeat layers, ending with sauce. Top with almonds. Bake 30 minutes or until bubbly. Do not add liquid, even if it looks dry. Freezes well.

Serve with rice, baked potato or baked sweet potato. Or, you know, beets. Or parsnips. Whatever suits your fancy.

By the way, the leftovers are really good as filling for quesadillas or as stuffing for hot baked potatoes. Personally, I like to reheat the casserole in a big ole skillet and let the cheesy part get sort of crispy around the edges only I can’t talk about that anymore or I’m going to go into the kitchen and pan fry some shredded cheese, just as the good Lord intended.

Regardless, I love it when leftovers are versatile and make you feel like you’re getting an entirely different meal. Because then you get credit for cooking something new and different without having to cook anything new and different. It’s a thing of beauty, my friends.

Enjoy, y’all!

I Am Powerless To Resist The Cheesy Deliciousness

img_1872.jpg

(Thanks, Sunni, for the heads-up about this delicious new Cheez-It combo.)

(Thanks, Publix, for putting Cheez-Its on sale this week.)

(You’re welcome, hips, for all the new calories I’ll be sending your way in the next 24-48 hours.)

(Assuming this particular box of Cheez-Its makes it that long.)

(And that is a very lofty assumption.)