Before I bore you to crashing new lows with pictures of how I put up some window treatments in my kitchen without sewing a single stitch, I feel like I need to say something.
I still haven’t watched the most recent episode of The Bachelorette. I know. I KNOW.
So, since I haven’t seen it, I haven’t blogged about it. Some sweet friends spent the night with us Monday, and we ate good Mexican food and painted canvases (oh yes we did) and played spades and ate strawberry cake. It just didn’t seem right to interrupt all the fun to watchThe Bachelorette and then have to listen to Tanner P. talk about Jillian’s feet.
Any. way.
A few of y’all have emailed me with cabinet-painting questions, and considering that I have painted kitchen cabinets one whole time in my life, I don’t know that I’m your best resource. But as far as my personal experience: no, I didn’t sand the doors. Well, that’s not entirely true. I sanded one of them, hated the mess it made all over my countertops, decided that sanding would make my life miserable since it would essentially shut down my kitchen for a full day and the people around here are real funny in that they expect to eat and stuff, so I didn’t sand. I also didn’t take the doors off before I painted because the hinges had already been painted, so it wasn’t like I could restore them to their original glory. I just painted over them again. I also didn’t paint my shelves because they didn’t really need it.
Another also: since our house is about 35 years old, our cabinets are real-live wood, and I think that’s one reason the painting was pretty easy. Maybe. I don’t know. Maybe laminate is easier. I don’t know. Why am I giving advice? I’m an amateur. Don’t listen to me.
I have some issues with confidence.
After I finished painting the cabinets, I decided to recover my chairs in the fabric I showed you a couple of days ago. You know. This stuff.
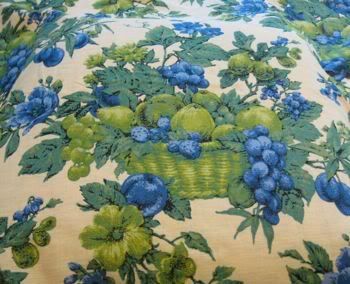
So I recovered the chairs and really liked the results but felt a little sad that you couldn’t see the fabric as soon as you walked in the kitchen. It seemed like the fabric needed to be on the windows, but how in the world could I do that because I’m not a very strong seamstress, and by that I mean that while yes, I could sew on a button for you, you wouldn’t necessarily want for me to do that. Because of how horrid it would look after I was finished and all.
But.
Saturday afternoon Melanie reminded me of a post of The Nester’s where she documented how she made window treatments in her sister’s kitchen. So I re-read it. And I thought about my fabric. And I decided that if I could just figure out the right places to fold it, I could do something similar.
The Nester uses upholstery tacks when she does no-sew window treatments, and while I did have some upholstery tacks, I was working by myself and couldn’t seem to keep the fabric in the right place AND nail in the tack. So I used clear push pins like you’d use on a bulletin board (obviously I am very, very fancy). I’ll go back at some point and replace the push pins with upholstery tacks, but for now they’re fine. You can barely see them.
I made a practice treatment on our garage door – I just cut about a yard of fabric, then folded it and folded it until the part of the pattern that I wanted to show was showing AND until I figured out what length worked best on our window panes. This part of the process probably took me 30 or 45 minutes – there was lots of folding and refolding and pushpinning and whathaveyou – but once I figured out a little system, it was easy breezy from there on out (Nester’s instructions are way more specific and helpful, by the way).
And here’s the almost-final result, except for the part where I replace the push pins with upholstery tacks and make a few little daily adjustments because I am an obsessive adjuster and also quite annoying.
This is in the little office off of the kitchen, only now it’s totally even because you’d better know I spent some quality time getting everything JUST SO Sunday afternoon.
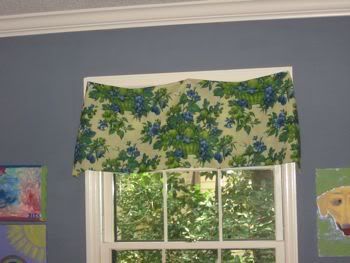
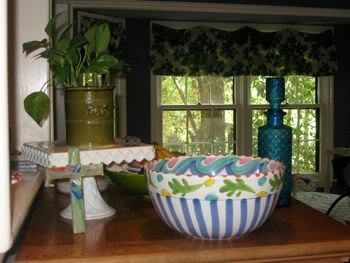
And this is in the actual kitchen, only now the one on the far right is a little bit shorter so that it matches up better with the others. The big window in the center actually has two separate window treatments – I just tried to pin them so they’d look like one big thing.
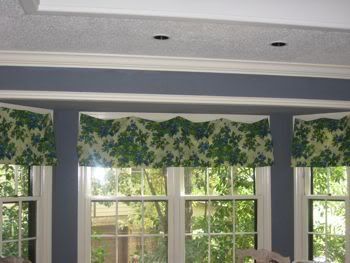
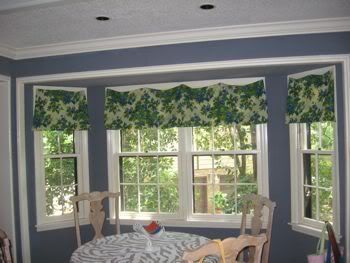
(Yes, I know the animal print on the table doesn’t match. I’ll cross that bridge in a couple of days or maybe sometime in 2012.)
Best part?
TOTALLY FREE.
Zero dollars and zero cents.
And on top of that, the kitchen feels so much warmer and cozier and betterer. I can’t even tell you how much more “finished” it feels. Makes me smile every single time I walk in there – maybe even moreso because the fabric was Aunt Roxie’s and I just know she’d be so tickled that I’m getting to enjoy it every single day.
Here’s the thing: if you can fold fabric and use a thumbtack, you can TOTALLY do this. Oh yes ma’am you can. It may not be perfect, but it’ll be bright and crisp and colorful and cheerful. And that is always delightful.
The end.
Recent Comments